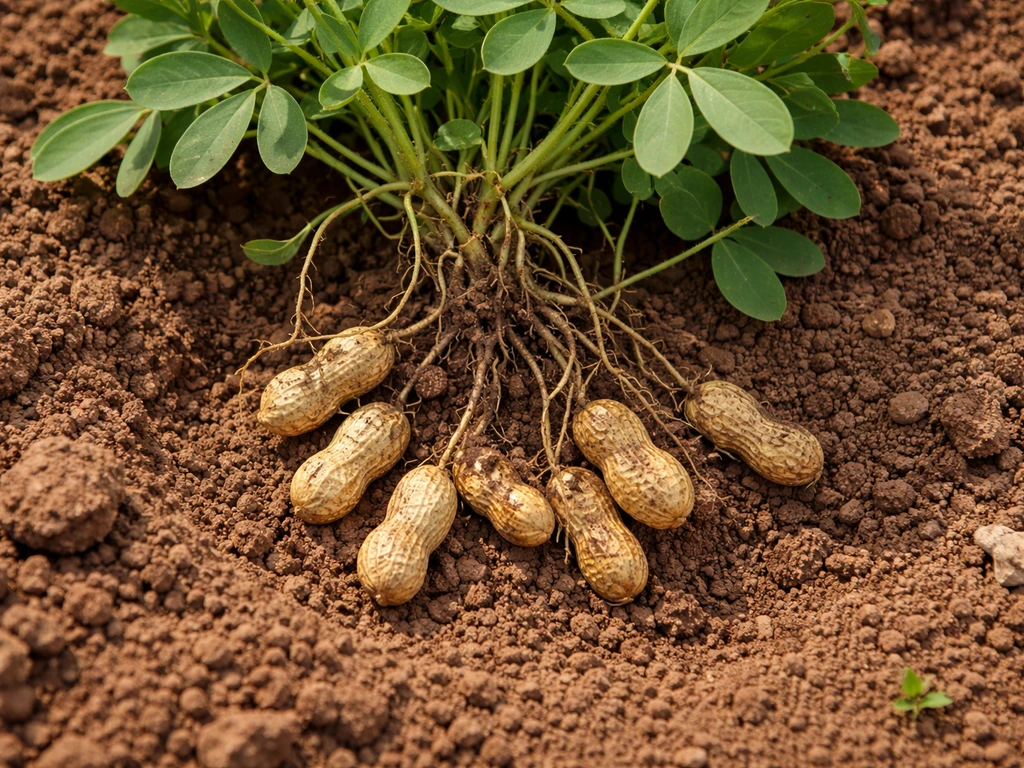
Monkey nuts are peanuts (Arachis hypogaea), and they grow in a way that surprises most people: the flowers appear above ground, then a structure called a peg pushes down into the soil where the actual pods develop underground. To grow them successfully at home, you need a long warm season (ideally 120–150 frost-free days), loose well-drained soil with a pH of 6.0–6.5, full sun, and consistent moisture of about 1–2 inches of water per week. Get those basics right and you can grow a respectable crop in a backyard plot.
Monkey Nuts How Do They Grow: Where to Plant and Steps
Marcus Hendricks
24 Apr 2026
What monkey nuts actually are
The term 'monkey nut' is used most commonly in the UK and parts of Europe to describe an in-shell peanut. Botanically, that is Arachis hypogaea, also called the groundnut or goober. It is a legume, not a tree nut, which already sets it apart from most other nuts covered on this site.
Unlike pine nuts or beech nuts, which come from trees that take years to mature, Arachis hypogaea is a low-growing annual plant that you can sow, grow, harvest, and dry within a single season. The plant reaches roughly 30–50 cm in height and spreads as a bushy, sprawling clump. Understanding that it is a legume also explains why it fixes its own nitrogen through root nodules, which has real implications for how you feed it (more on that below).
Where monkey nuts grow naturally and where they thrive today
Arachis hypogaea is native to South America, with the primary center of diversity in Central Brazil and surrounding regions. From there it spread through trade routes across the tropics and subtropics, and today it is cultivated on every inhabited continent. The crop does best where summers are long, warm, and not excessively wet. The FAO puts the optimum mean daily temperature range at 22–28°C. Yields start to suffer above 33°C and below 18°C, which tells you a lot about where this plant wants to live.
In the United States, commercial production is concentrated in the Southeast (Georgia, Alabama, North Carolina, Virginia, Texas, and Florida), but home gardeners in USDA zones 6 through 11 can grow peanuts with varying degrees of success. Gardeners in zones 5 and cooler can still try with early-season indoor starting, though the margin is tight. Globally, major producing countries include India, China, Nigeria, and Sudan. In all cases the common thread is a reliable warm season, moderate rainfall (the crop needs roughly 500–700 mm across the growing period), and well-drained soils.
Soil, temperature, and light: what you need before you plant
Soil texture matters more with peanuts than with almost any other crop you might grow at home. Because the pods develop underground, compacted or heavy clay soils physically prevent the pegs from penetrating properly and make harvest a destructive mess. You want loose, friable, sandy loam. If your soil is heavy, work in sand and organic matter before planting, and consider raised beds. Drainage is non-negotiable: waterlogged roots lead to rotting pods and disease, which is why extension guidance consistently recommends hilling your rows (mounding soil up around the base of the plant, similar to how you hill potatoes) to keep pods clear of standing water.
Soil pH should sit between 6.0 and 6.5. At lower pH values, nutrient availability drops and aluminium toxicity can become an issue. If a soil test shows your pH below 5.8, lime the bed several weeks before planting and aim for a target of around 6.2–6.5. Do not over-fertilise with nitrogen: since peanuts fix their own nitrogen through root bacteria (Bradyrhizobium), excess nitrogen actually suppresses nodulation and reduces yield. A modest phosphorus and potassium application based on a soil test is usually more useful.
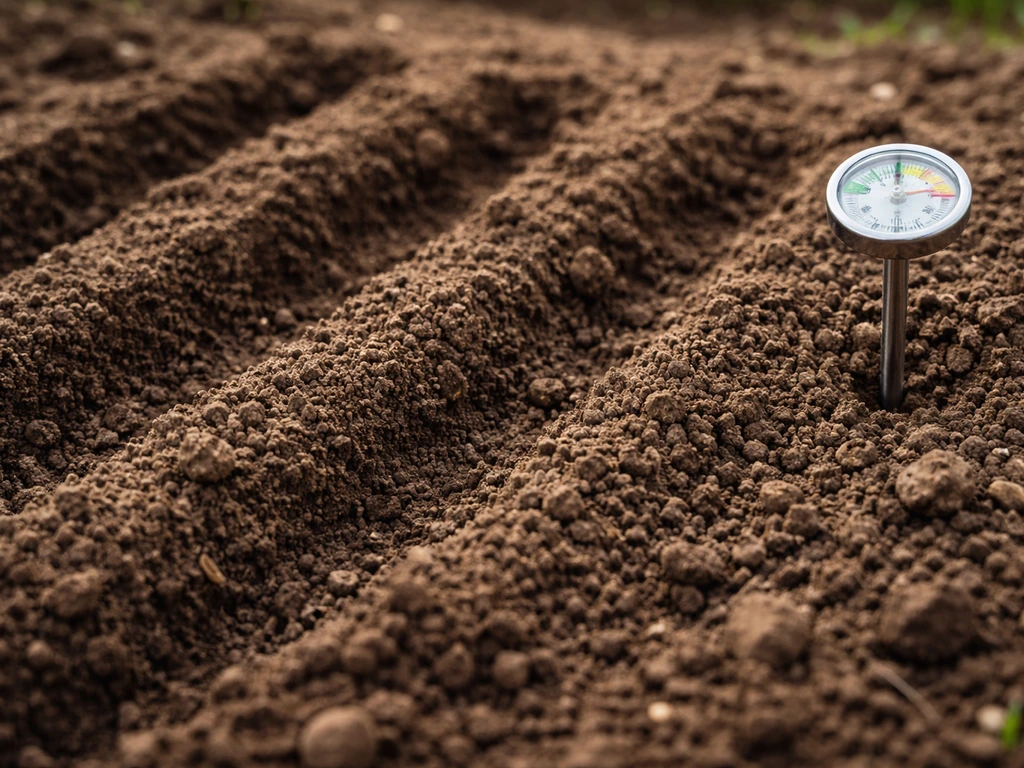
For light, full sun is not optional. Peanuts need at least 6–8 hours of direct sun daily to flower well and produce a decent yield. Part-shade conditions will give you leafy growth and very few pods. Soil temperature at planting depth should be at least 18°C (65°F), and many growers wait until it hits 21°C to be safe. Planting into cold soil delays germination, invites fungal seedling diseases, and wastes the narrow warm-season window you have.
How monkey nuts actually grow: the life cycle from seed to pod
The peanut life cycle is genuinely fascinating and understanding it helps you avoid a lot of mistakes. Here is how it unfolds from germination to mature pod.
- Germination (days 5–10 after sowing): The seed coat splits and the radicle pushes into the soil. The cotyledons may briefly emerge above ground before the shoot overtakes them. Soil moisture must be consistent here but not waterlogged.
- Vegetative growth (weeks 2–6): The plant puts on leaves and lateral branches. Root nodules begin forming if Bradyrhizobium inoculant is present in the soil. The plant does not look dramatic at this stage but underground development is critical.
- R1 — Beginning bloom (around 4–6 weeks after emergence): Small yellow flowers appear at leaf axils. Flowers are self-pollinating and open early in the morning, often closing by midday. This is when things get interesting.
- R2 — Beginning peg formation: After a flower is fertilised, an elongated structure called the gynophore (commonly called the peg) grows downward from the base of the flower. The peg is positively geotropic, meaning it actively grows toward the ground regardless of where the flower was. This is the geocarpic behaviour that defines the species.
- R3 — Beginning pod: The peg tip penetrates the soil (typically 2–7 cm deep) and the embryo begins developing horizontally underground. This is why loose, friable soil is so important: if the peg cannot penetrate, no pod forms.
- R4 through R7 — Pod and seed fill: Over several weeks, the pod swells and the seeds develop. The pod shell hardens and develops the characteristic reticulate (netted) surface. The plant continues flowering and setting new pegs throughout this period.
- R8 — Harvest maturity (approximately 120–150 days after planting): The inside of the pod shell develops dark streaks and patches. The seeds fill the shell and begin to separate slightly from the pod wall. This is your harvest window.
- R9 — Overmaturity: If left too long, pods begin to separate from the plant and stay in the ground when you dig. You lose yield and quality deteriorates.
One thing worth knowing: because peanuts flower and peg continuously over many weeks, not all pods on a single plant reach maturity at the same time. The pods you dig will include a mix of mature, nearly mature, and younger pods. That is normal. The standard approach is to harvest when the majority of pods show maturity signs rather than waiting for every single pod.
Step-by-step: how to grow monkey nuts in a backyard plot
Step 1, Timing your sow
Work backward from your average first autumn frost date. Peanuts need 120–150 days, so if your first frost is around October 15, you need to be in the ground by late May at the latest, and ideally by mid-May. In cooler zones (5–6), start seeds indoors 3–4 weeks before your last frost date so the plants can go out as transplants once soil temperatures are reliably above 18°C. Use raw (unroasted) peanuts still in the shell, or buy certified seed peanuts. Shell them gently just before planting to avoid damaging the seed coat.
Step 2, Prepare the bed
Dig your bed to at least 30 cm deep and break up any compaction. Incorporate compost to improve texture, not to add nitrogen. Do your soil pH test and lime if needed. Avoid adding fresh manure, which can encourage lush foliar growth at the expense of pods and can introduce pathogens. Rake the surface to a fine tilth so pegs can penetrate easily.
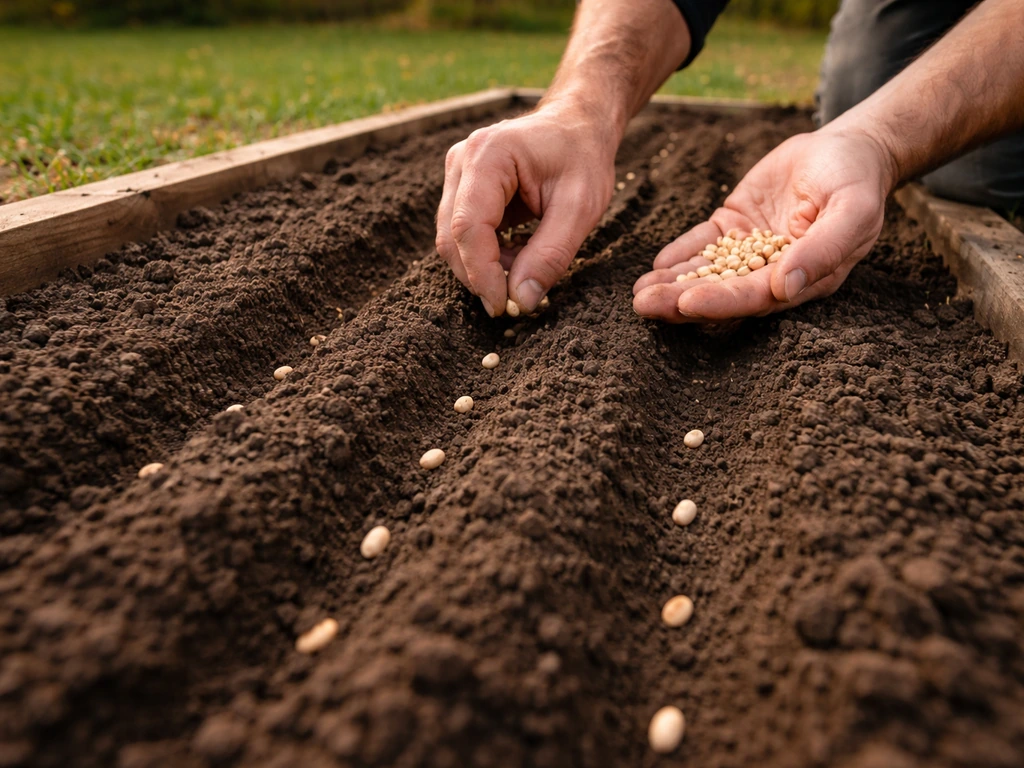
Step 3, Sowing and spacing
Sow seeds about 5 cm deep, spacing them 20–25 cm apart within rows, with rows 60–75 cm apart. If you are transplanting seedlings started indoors, handle the roots gently and water in well. Apply a layer of mulch around the plants once they are a few centimetres tall to conserve moisture and suppress weeds, but pull the mulch back slightly from the immediate base of the plant to discourage stem rot.
Step 4, Hilling
About 4–6 weeks after planting, when the plants are flowering, mound loose soil up around the base of each plant. This is hilling, and it serves two purposes: it gives the pegs a loose, easily penetrable substrate to grow into, and it improves drainage around the developing pods. Do this gently to avoid disturbing the early pegs. A second hilling a few weeks later is beneficial. This is the step most home gardeners skip, and it directly affects yield.
Step 5, Watering
Aim for 1–2 inches of water per week, delivered consistently. Peanuts are somewhat drought tolerant once established, but moisture stress during flowering and pod fill significantly cuts yield. Conversely, overwatering or letting the bed become waterlogged promotes root and pod rots. Drip irrigation or a soaker hose at the base is far better than overhead watering, which can promote foliar diseases.
Step 6, Weeding and care through the season
Keep weeds down, especially early on, but be careful around the base of plants once pegs are forming. You do not want to disturb pegs that have already entered the soil. Hand weeding or shallow cultivation is safer than hoeing close to the crown. Once the canopy closes over the rows, weed pressure typically drops on its own.
Harvesting and curing: getting usable monkey nuts
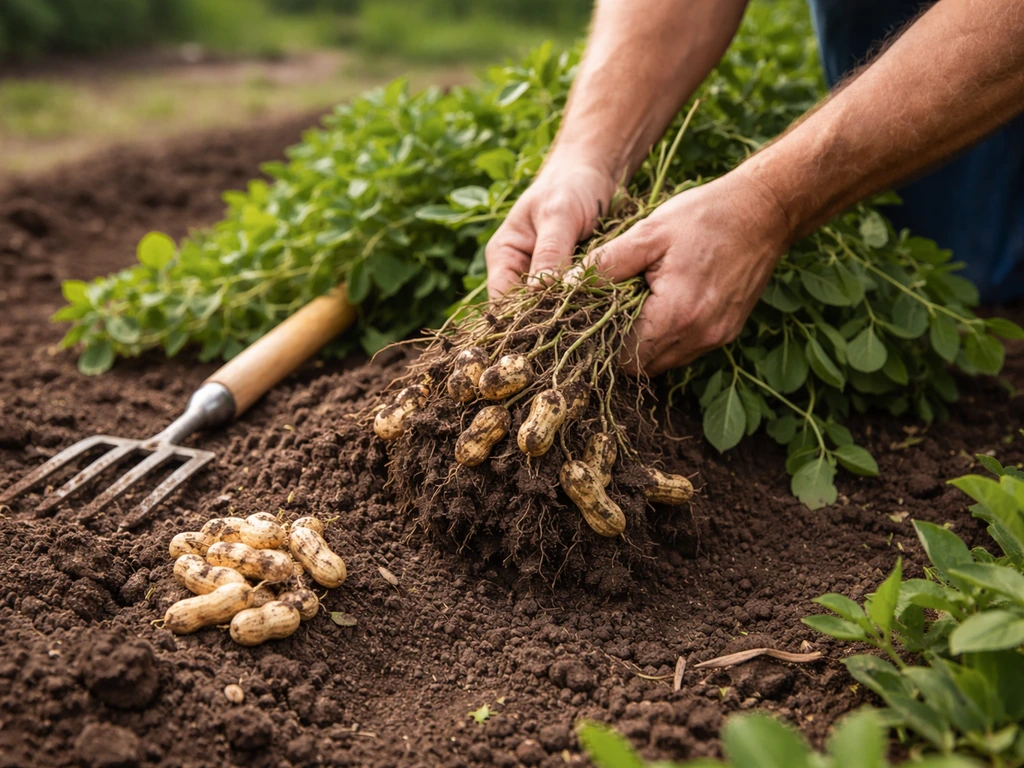
The harvest timing signal for home gardeners is straightforward: dig when the leaves begin to yellow and the plant starts to look tired, or just before or after the first light frost in autumn. At that point, use a garden fork to loosen the soil well away from the plant crown, then lift the whole plant. You will find pods clinging to the roots and some will be left behind in the soil, so sift through the dug area to find stragglers.
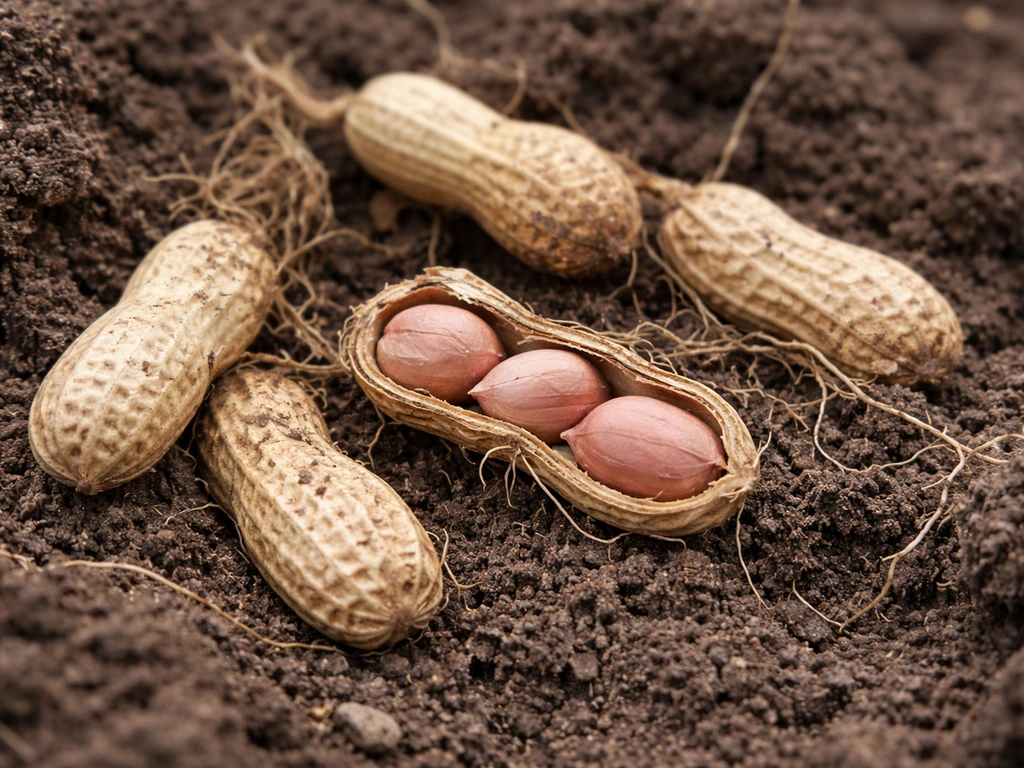
To check maturity before committing to a full dig, pull one plant and cut a few pods open. A mature pod will show darkened inner pod walls with streaking and the seed will fill the shell. The seed skin (testa) colour will have developed fully for the variety. If most pods look immature, give the bed another 1–2 weeks.
After digging, shake off the excess soil and leave the plants to cure. The standard home-garden method is to hang or stack the uprooted plants in a warm, well-ventilated area, leaving the pods attached to the plant. Allow 1–2 weeks on the plant, then remove the pods and continue drying the loose pods for a total curing period of around 4 weeks. Proper drying is genuinely important: peanuts that go into storage at too high a moisture content are at real risk of aflatoxin contamination from Aspergillus mould growth. You want the pods dry enough that the seeds rattle slightly inside the shell before storing.
For controlled drying, keep air temperature no more than 25°C above ambient and ensure good airflow around the pods. Do not rush the process with high heat, which can damage seed quality. Once properly dried, store in mesh bags or breathable containers in a cool, dry location.
Common problems and how to deal with them
Poor germination or damping off
If seeds rot in the ground or seedlings collapse at the base shortly after emergence, cold soil is usually the culprit. Soil below 18°C slows germination dramatically and creates a long window for fungal pathogens to attack the seed or seedling. Wait for warmer conditions, use treated seed or apply a biological fungicide seed treatment, and improve drainage. Starting seeds indoors eliminates most of this risk.
Leaf spots and rust
Early leaf spot (Cercospora arachidicola) and late leaf spot (Cercosporidium personatum) are the most common foliar diseases you will encounter. Both start as small brown or black spots and can defoliate a plant if left unchecked, which seriously cuts into pod fill. Rust (Puccinia arachidis) produces orange pustules on leaf undersides.
The practical management approach at home is threefold: do not grow peanuts in the same bed two years in a row (rotate with a non-legume crop, ideally with 3–4 years between peanut crops), remove and bin (do not compost) infected plant debris at the end of the season, and avoid overhead watering. Copper-based fungicides are an option if disease pressure is high, but rotation and sanitation do most of the work.
Nematodes
Root-knot nematodes (Meloidogyne species) are a serious peanut problem in sandy soils. Infested plants look stunted and yellow, and the roots show characteristic galls when you pull them. Chemical nematicides are not appropriate for home gardens due to toxicity concerns. The realistic options are: choose nematode-resistant varieties where available, rotate with non-host crops like grasses or brassicas, add organic matter to improve soil biology, and consider solarizing the bed in summer before planting if nematode pressure has been severe.
Empty or poorly filled pods
Hollow or underfilled pods usually come down to one of three things: pegs could not penetrate compacted soil (fix: loosen the soil and hill properly), moisture stress during pod fill (fix: consistent irrigation at 1–2 inches per week), or harvesting too early before seeds have fully developed. Check the inside pod wall colour before committing to a full harvest dig.
Aflatoxin risk in storage
This one does not show up in the garden but it matters enormously post-harvest. Aflatoxins are produced by Aspergillus fungi and they are harmful at very low concentrations. The risk is highest when pods are harvested under drought stress (which can crack the seed coat and allow mould entry), when pods are damaged during digging, or when drying is rushed and pods are stored at too high a moisture level.
Recommended storage moisture targets are also emphasized in the reviewed literature, including <7% for shelled peanuts and <9% for unshelled peanuts to help prevent Aspergillus fungal growth [drying is rushed and pods are stored at too high a moisture level](https://pmc. ncbi. nlm. nih.
gov/articles/PMC6886384/). The practical prevention approach is simple: cure fully, store dry, and discard any pods that show mould growth, shrivelling, or off smells. Do not eat discoloured kernels.
Wildlife and pest damage
Squirrels, mice, and voles will happily dig up pods, especially as they mature and develop their nutty scent. Wire mesh laid over beds (lifted at harvest) or physical barriers around the plot are more effective than deterrent sprays for persistent wildlife pressure. Thrips and aphids can affect foliage but rarely cause serious yield loss unless populations are very high.
Is your climate suitable? A quick reality check
| Climate / Zone | Suitability | Key adjustment needed |
|---|---|---|
| Tropical / subtropical (zones 9–11) | Excellent | Manage excess wet-season rainfall and ensure good drainage |
| Warm temperate (zones 7–8) | Good | Choose early-maturing varieties; plant as soon as soil warms to 18°C |
| Cool temperate (zones 5–6) | Possible with effort | Start indoors 3–4 weeks early; choose fast-maturing varieties (100–110 day types) |
| Cool / short season (zone 4 and below) | Very difficult | Growing season usually too short even with indoor starting; not recommended |
| Semi-arid / dry summer climates | Good if irrigated | Reliable irrigation essential; excellent pod quality possible with dry harvest conditions |
If you are interested in how the growing timelines for other nuts compare, the contrast with tree nuts is striking. Peanuts go from seed to harvest in a single season, while pine nuts, beech nuts, and most tree-based nut crops involve years of establishment before meaningful yields. Pine nuts how they grow are different from peanuts because they come from mature conifer cones, not underground pods.
That makes the peanut genuinely unique in the nut world and one of the most accessible nut crops for a home gardener to try in a single season. Betel nut is grown differently than peanuts, but you can still learn the typical growing conditions and stages it goes through how does betel nut grow.
FAQ
Can I plant store-bought monkey nuts (in-shell peanuts) instead of certified seed peanuts?
Yes, you can, but only if they are truly “seed peanuts” or raw, unroasted peanuts sold for planting. Most supermarket in-shell peanuts have been roasted, heat-treated, or may not have viable seed coats, so they often fail to germinate even if the timing is right. Keep shell peanuts cool and dry until planting, and shell them only right before sowing to reduce rot risk.
What happens if my warm season is shorter than 120 to 150 frost-free days?
Use your local frost dates, but also back up from the soil warmth. If your area cools quickly in late summer or early fall, peanuts may still look green while pods are not fully filled, so you could dig underdeveloped pods. In that case, start seeds indoors and transplant once soil reliably exceeds about 18°C, and consider choosing earlier-maturing varieties if available.
How important is the second hilling step for monkey nuts?
Don’t hill only once. A second hilling a few weeks after the first, when flowering is well underway, helps because pegs keep entering the soil over time. Skipping the second mound commonly leads to pods developing too close to the surface or in areas that stay wetter or more compacted, which lowers yield and makes harvest messy.
Can monkey nuts grow in partial shade?
Yes, but timing and placement matter. Too much shade reduces flowering and you will get fewer pegs. If you must plant in partial shade, aim for the brightest side of the yard and avoid areas that stay cool at morning or have dense tree root competition. Even with good soil, reduced sun usually means smaller, less complete pods.
Is it okay to water peanuts from above (sprinklers)?
Overhead watering is the main way home gardeners accidentally worsen leaf spot and rust risk. If you don’t have a drip or soaker setup, water early in the day, use a gentle flow at soil level, and avoid wetting foliage. Consistent base watering also supports steady pod fill, which helps reduce hollow pods.
Should I fertilize with a lot of nitrogen to help monkey nuts grow?
Yes, and it’s a common mistake. Excess nitrogen pushes leafy growth and can reduce the root nodules that peanuts rely on, leading to fewer filled pods. Use a soil test to guide phosphorus and potassium, and if you fertilize, keep nitrogen modest or avoid it entirely unless your test shows a clear deficiency.
Can I grow monkey nuts in heavy clay soil?
Sandy loam is ideal, but raised beds are especially helpful if your garden is heavy clay or stays wet after rain. The key is loose, well-drained soil where pegs can penetrate and oxygen can reach developing pods. If you notice pooling or crusting on the bed surface, you likely have a drainage problem that you should fix before planting.
How do I know the curing is done well enough for storage?
They should not be stored while still too moist. If you see moldy spots, shriveling, or a musty smell, discard them because aflatoxin risk rises when drying is incomplete or pods were damaged and stored damp. Also, avoid “quick drying” with high heat, which can lower seed quality and increase quality defects even if they seem dry outside.
When should I stop weeding with a hoe to avoid disturbing developing pods?
Keep weeds down early, but stop cultivation once pegs are forming. If you hoe or dig near the crown after pegging begins, you can cut or dislodge pegs that are already developing underground. Hand weeding and shallow tools away from the base are safer, and mulch helps reduce the amount of weeding you need during that critical period.
Can I transplant monkey nuts after they’ve started growing?
Try to avoid moving or replanting after planting because peanuts form pegs and early underground structures quickly. If you started indoors, transplant only once seedlings are strong and the soil is warm enough, and water in gently. After pegging begins outdoors, disturbance can cause yield loss.
Why do some pods mature later even when the plant looks tired?
Not exactly. Mature pods often show internal darkening and the seed is filled, but you cannot rely on plant browning alone because flowering and pegging continue for weeks. If you want a reliable call, pull a sample plant and cut a few pods open, then decide whether to dig based on the majority’s pod wall color and seed fill.
Do thrips or aphids significantly reduce peanut yield at home?
Yes, pest pressure can increase damage but most issues show up as foliage problems. Thrips and aphids usually affect leaf health more than pod set unless populations explode, so focus on disease prevention first (sun, spacing, no overhead watering, rotation). If insects are heavy, monitor frequently and intervene early rather than waiting for large patches of defoliation.