Yes, you can grow a horse chestnut tree from a conker, and it is one of the more satisfying propagation projects you can do in a garden. The process is straightforward but not instant: it requires patience, the right moisture conditions, and a period of cold stratification before the seed will do anything at all. Get those basics right and germination rates are genuinely good. Skip them and you will be staring at a pot of compost for months wondering what went wrong.
How to Grow Horse Chestnut Trees from Conkers
Marcus Hendricks
11 Apr 2026
Before going further, it is worth clarifying one thing that trips people up constantly. Horse chestnut (Aesculus hippocastanum) is not the same plant as a true chestnut (Castanea species). The seeds look similar and share a name in casual conversation, but they are unrelated botanically. Horse chestnuts are not edible, their growing requirements differ, and their seeds behave differently during germination. If you are curious about how the true, edible chestnut develops, how chestnuts grow covers the Castanea side of things in detail. This article is entirely about Aesculus hippocastanum, the big-canopied ornamental tree with the sticky buds and the spiky green seed cases.
Choosing viable conkers
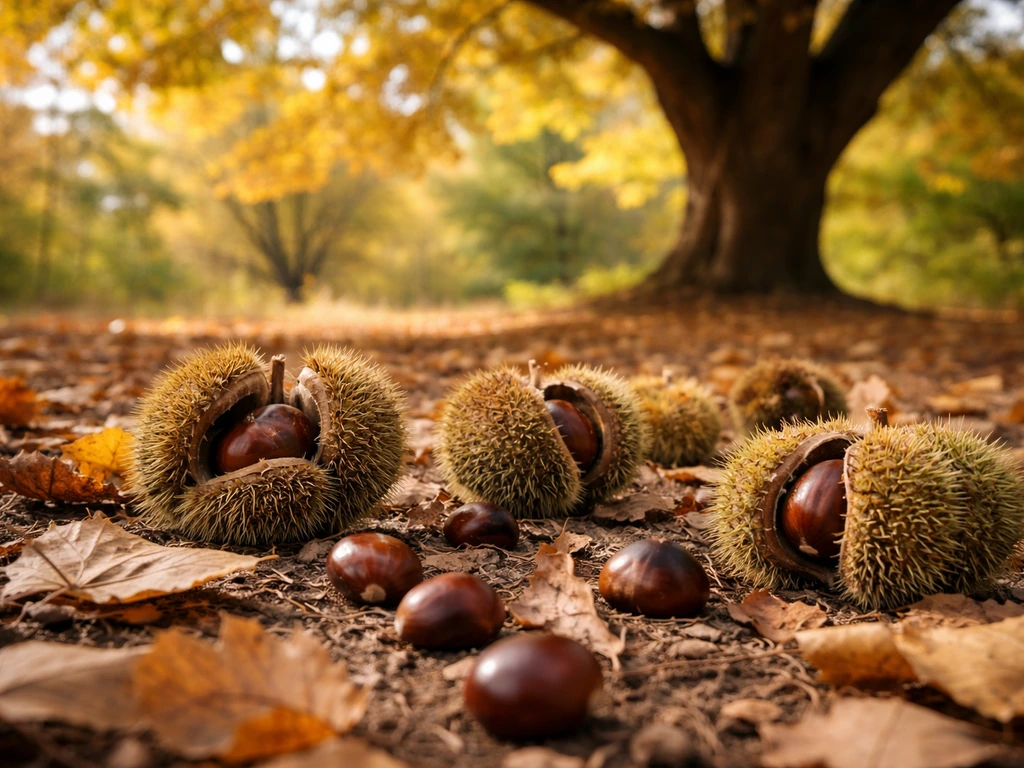
The single biggest factor in whether your conkers germinate is how fresh and moist they are when you collect them. Horse chestnut seeds are what botanists call recalcitrant, which means they cannot survive drying out the way orthodox seeds (like sunflower or bean seeds) can. Research published in the Annals of Botany found that viability drops sharply once seeds are allowed to desiccate, and a separate study found that drying Aesculus hippocastanum seeds down to just 20% moisture content left only about 10% of seeds viable. In plain terms: a dry, shrivelled conker is almost certainly dead before you have even started.
Collect conkers in autumn as soon as they fall from the tree naturally. The best ones drop out of their cases on their own and land on the ground intact. Look for conkers that are deep, rich brown, firm to the touch, and heavy for their size. Reject anything that feels light, has soft spots, smells off, or shows any obvious cracking or shrinkage. If you are collecting from the ground, do it within a day or two of them falling because they start losing moisture and become targets for mould almost immediately in wet weather.
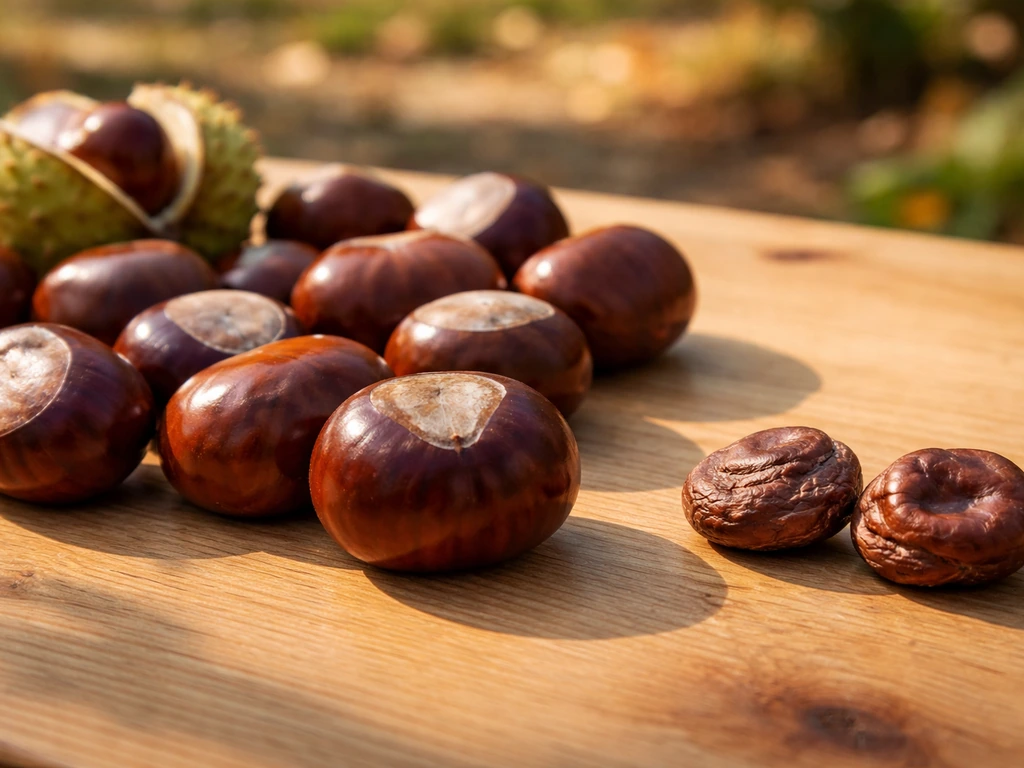
A useful quick test: drop suspect conkers into a bucket of water. Seeds that float are usually low-density and likely not viable. Sinkers are your best candidates. It is not a perfect filter, but it weeds out the obvious duds before you invest weeks in stratification.
Preparing conkers for germination
Cleaning and initial soaking
Once you have selected your conkers, give them a rinse under cool water to remove any soil or debris from the outer shell. Iowa State University Extension recommends soaking the nuts at room temperature for two to four days before stratification begins. This rehydrates the seed coat and appears to improve germination consistency. Use plain water, change it daily to prevent stagnation, and keep the conkers submerged. After soaking, they should look plump and feel noticeably firmer.
Cold stratification: the non-negotiable step
Stratification is the process of mimicking winter conditions to break dormancy, and horse chestnuts need a substantial period of it. Iowa State University Extension specifies 120 days at 41°F (5°C) for Aesculus hippocastanum, which lines up with the Reforestation, Nurseries and Genetics Resources protocol of 120 days of cold moist stratification for the Aesculus family. UF/IFAS rounds this to four to five months at 50°F. Either way, you are looking at roughly four months in cool, moist conditions before the seed is ready to germinate.
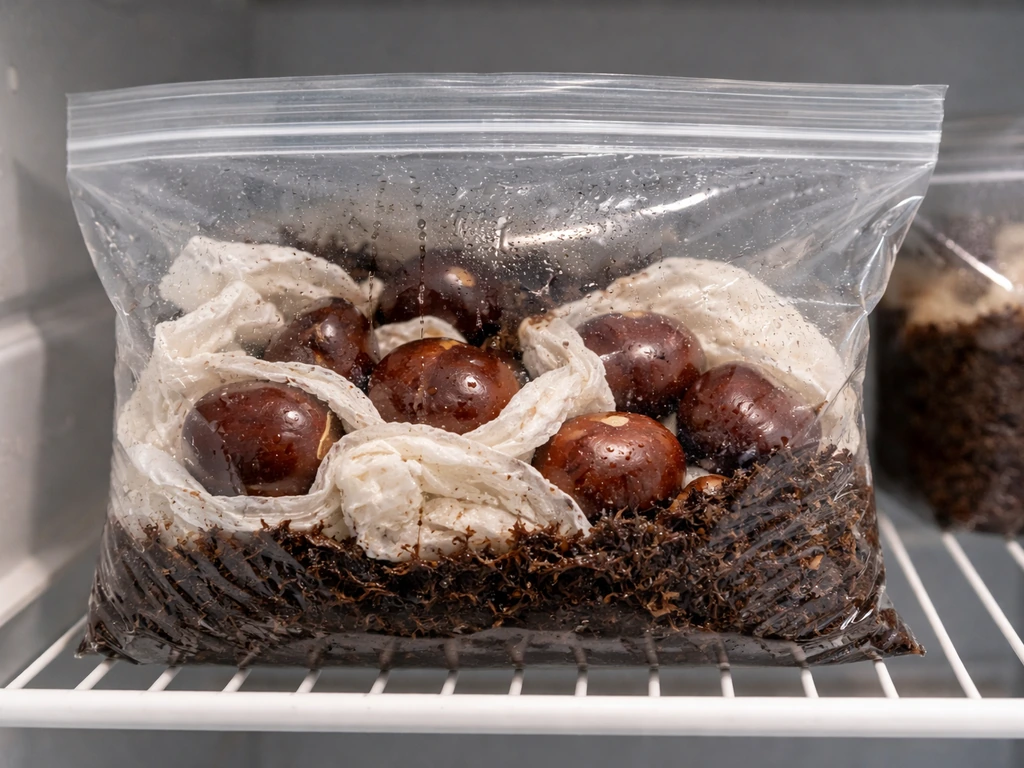
The practical method: place your soaked conkers in a sealable plastic bag or container with damp (not wet) horticultural sand, perlite, or peat-free compost. The medium should feel like a wrung-out sponge, not sodden. Seal the bag and put it in the fridge at 34 to 41°F (1 to 5°C). Check it every two to three weeks. If you see any mould, remove affected seeds, wipe the bag, and refresh the medium. If the medium dries out, mist it lightly. Forest Research (UK) notes that Aesculus hippocastanum seeds can be stored for 18 to 24 weeks in non-drying conditions at 0°C, so a standard household fridge works well.
Getting the timing right
If you collect conkers in October and begin stratification immediately after soaking, four months puts you at late February. That is a good target: the seeds finish their cold period just as you are approaching the last frosts, and you can sow into pots indoors or in a cold frame ready for spring. Collect in September and you might be ready by January, which is fine for pot sowing under cover. The key is counting backwards from when you want to sow, not rushing the process.
Sowing methods and depth
Pots vs direct sowing in the ground
Both methods work, but starting in pots gives you more control over moisture, temperature, and protection from squirrels (which will absolutely find and eat your conkers if you sow directly into open ground). For beginners, pots are the better bet. Use deep individual pots or root trainers rather than shallow trays, because horse chestnut seedlings develop a substantial taproot very quickly and resent having it cramped or disturbed.
If you prefer direct sowing outdoors, autumn sowing is a legitimate option. You can skip the artificial fridge stratification and simply let the seed go through winter naturally in the ground. Plant in a bed with good drainage where squirrels are less of a problem, and mark the spot carefully. This mirrors what happens in nature when a conker falls and gets buried by leaf litter.
Correct depth and spacing
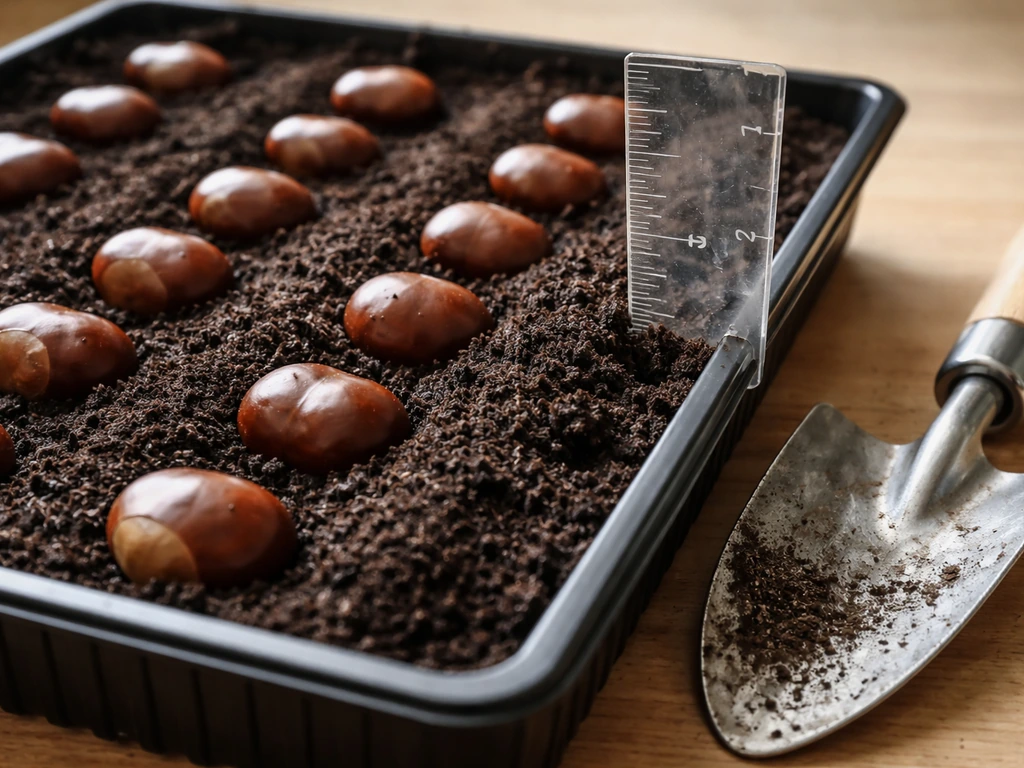
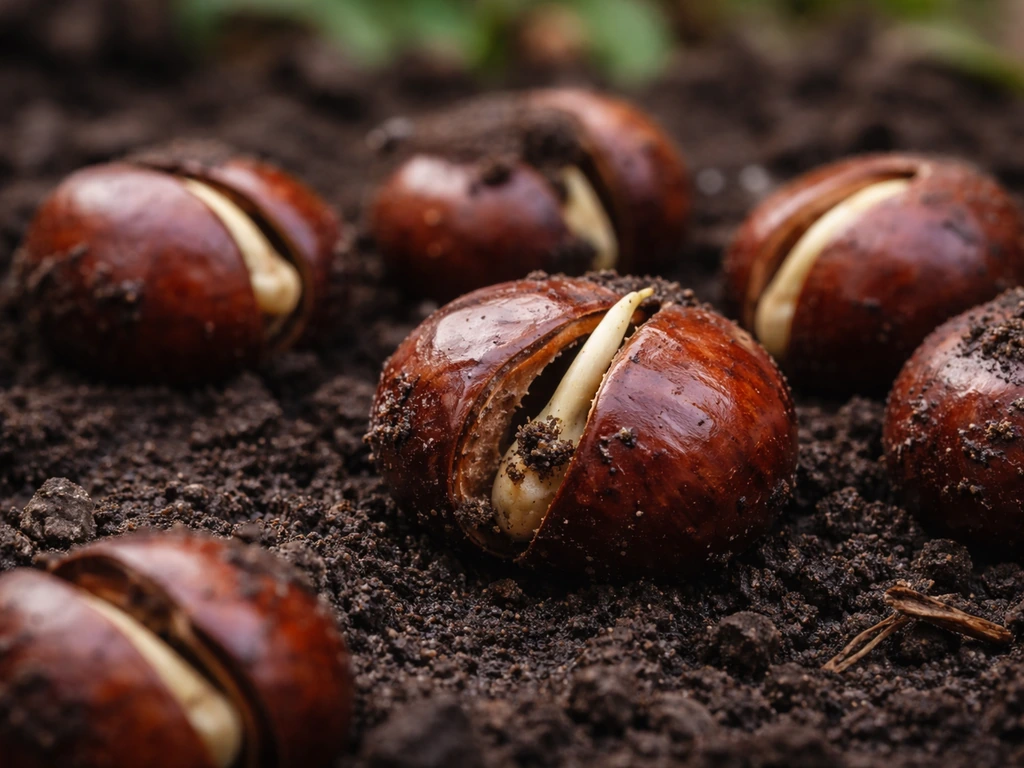
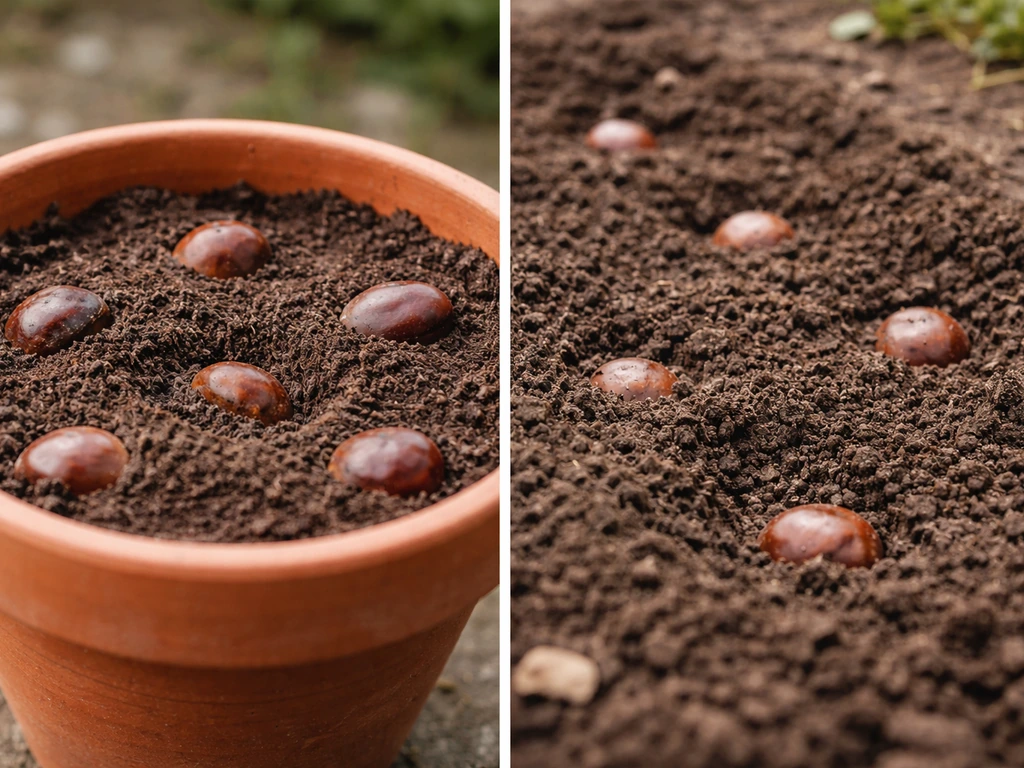
UF/IFAS guidelines recommend sowing seeds about one to two inches apart in rows six inches apart, covered with one to two inches of soil. For individual pot sowing, place one conker per pot with the flat side down and cover it with one to two inches of compost. Use a loam-based compost mixed with some grit for drainage. Water it in thoroughly, then keep the medium consistently moist but not waterlogged. Place pots somewhere with temperatures between 70 and 85°F (21 to 29°C) to encourage germination, which is the preferred germination temperature range cited by UF/IFAS.
Once stratification conditions are properly met, UF/IFAS notes that germination typically occurs within three to four weeks of sowing. Do not be alarmed if you see the root (radicle) emerge before any shoot appears above the soil surface. That is normal. The shoot follows once the root has established its anchor.
Growing conditions for young horse chestnuts
Light
Young seedlings need bright, indirect light to begin with. A windowsill facing south or west works well in the early weeks. Once the seedling is a few inches tall and has its first true leaves, move it to full sun if possible. Horse chestnuts in the wild grow into large, full-sun canopy trees, so they respond well to maximum light as they get bigger. Avoid deep shade; growth will be weak and leggy.
Soil
Horse chestnuts prefer deep, fertile, well-drained soil with a slightly acid to neutral pH. They tolerate clay soils better than many trees, but they do not like waterlogging around their roots, especially in the first year. For pot-grown seedlings, a mix of loam-based potting compost and about 20% horticultural grit gives the right balance of nutrition and drainage.
Watering
Keep the compost moist but never soggy. Horse chestnut seedlings are particularly vulnerable to root rot in their first few months. Water when the top inch of compost starts to feel dry, and always ensure pots have drainage holes. In summer, this might mean watering every two to three days. In cooler conditions, weekly watering may be enough. Watch the leaves: slight drooping in the midday heat is normal, but persistent wilting means the soil has dried out too much.
Temperature
Horse chestnuts are cold-hardy trees once established, tolerating temperatures well below freezing in winter. But young seedlings in their first year are more vulnerable to hard frost. If germination happens in late winter or early spring and temperatures are still dropping to freezing overnight, keep pots in a cold frame or unheated greenhouse rather than leaving them fully exposed. Move them outdoors into a sheltered spot once the risk of hard frost passes.
Transplanting and early care after germination
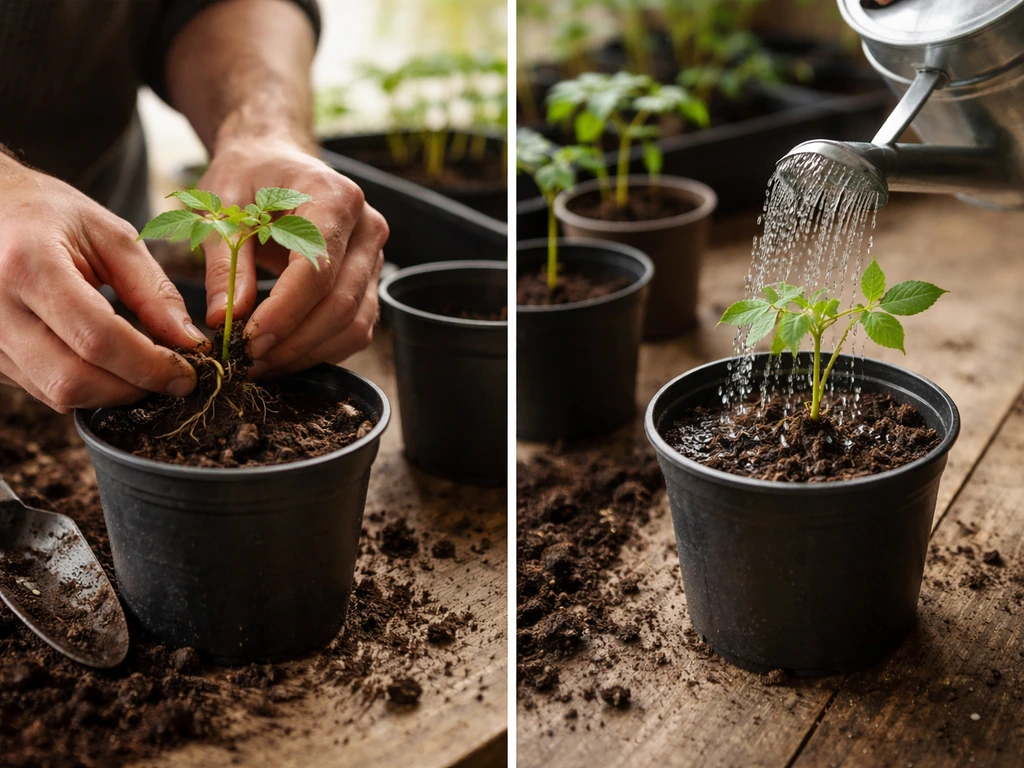
Seedlings are usually ready to pot up into larger containers after about six to eight weeks, once the root system has filled the initial pot. If you started in root trainers, you will be able to see when the roots are reaching the bottom. Move into a pot one or two sizes larger, using the same loam-grit mix. Avoid overpotting (moving into a pot that is too large) as excess compost stays wet and increases the rot risk.
Most gardeners keep seedlings in pots through their first full growing season, then plant out into their permanent position in autumn when the tree is dormant. By then, a healthy seedling will be 30 to 60 cm (roughly one to two feet) tall. Choose a site with full sun and at least 10 to 15 metres of clearance from buildings, underground utilities, and other large trees. Horse chestnuts are substantial trees at maturity, reaching 20 to 30 metres in height, so this is not a decision to rush.
At planting time, dig a hole twice the width and the same depth as the root ball. Backfill with the original soil rather than rich compost, which can encourage roots to stay in the immediate planting area rather than spreading outward. Firm in well, water thoroughly, and apply a mulch of wood chips or bark about 5 to 7 cm deep around the base, keeping it away from the stem. In the first year after planting out, water weekly during dry spells. After that, established trees generally look after themselves in terms of moisture.
Troubleshooting slow or failed germination
If nothing has happened after six weeks post-sowing, the most likely causes are insufficient stratification, seeds that dried out before or during storage, or temperatures that are too low for germination. Work through these in order before giving up.
- No germination after 4 to 6 weeks: Check that the stratification period was genuinely 120 days and that the fridge temperature held around 41°F. If stratification was shorter, extend it. If the temperature was too warm (above 50°F consistently), the dormancy may not have broken properly.
- Mould during stratification: This is common and usually manageable. Remove mouldy seeds immediately. Wipe the container, replace the medium with fresh damp sand or compost, and return the remaining seeds. A small dusting of powdered sulphur in the medium can help prevent recurrence. Do not seal the bag so tightly that there is zero airflow.
- Seeds rot after sowing: Usually caused by overwatering or compacted compost with poor drainage. Allow the surface to dry slightly between waterings and check that drainage holes are not blocked.
- Radicle appears but no shoot: Give it more time. The shoot can lag behind the root by two to three weeks. As long as the root tip looks white and healthy rather than brown and mushy, the seedling is still alive.
- Very slow growth in seedlings: Usually a light problem. Move to a brighter position. Slow early growth can also reflect a very shallow sowing depth, which leaves the seedling without enough anchor for its taproot to function properly.
- Squirrel or rodent predation in outdoor sowing: Cover the bed with wire mesh or chicken wire laid flat and pegged down over the sowing area until germination is well underway.
One thing worth accepting early: even with perfect technique, not every conker will germinate. A batch of ten good conkers producing six or seven seedlings is a solid result. Expecting 100% germination sets you up for disappointment.
Horse chestnut vs true chestnuts: know what you are growing
The confusion between horse chestnut and true chestnut (Castanea) comes up constantly, and it matters practically because the trees have quite different cultivation needs and very different regional suitability. A quick comparison helps clarify the distinction.
| Feature | Horse Chestnut (Aesculus hippocastanum) | True Chestnut (Castanea spp.) |
|---|---|---|
| Edibility | Seeds are toxic to humans | Seeds are edible and commercially grown |
| Origin | Balkans / Southeast Europe | Varies: Europe, Asia, North America |
| Mature height | 20 to 30 metres | 15 to 25 metres depending on species |
| Primary use | Ornamental shade tree | Food production and timber |
| Seed stratification | Cold moist, 120 days | Cold moist, 60 to 90 days (Castanea) |
| Soil preference | Deep, fertile, slightly acid to neutral | Well-drained, acidic, loamy |
| Cold hardiness | Hardy to USDA Zone 4 | Varies by species; Zone 4 to 7 |
If you are wondering whether true chestnuts grow in your part of the world, it is a topic worth exploring separately. For North American readers, the question of where chestnuts grow in the US has a more complex answer than most people expect, given the historical devastation of the American chestnut by blight. And if you are in the UK and wondering whether the trees you see in parks are edible sweet chestnuts or horse chestnuts, the article on whether chestnuts grow in the UK walks through that distinction clearly.
Where horse chestnuts actually thrive
Horse chestnuts are native to a small area of the Balkans but have been planted across temperate Europe and North America for centuries. They perform best in climates with genuine winters (needed to satisfy their dormancy requirements), warm summers, and reliable moisture. In USDA hardiness terms, they grow well in Zones 3 to 7. They struggle in climates with hot, dry summers and are susceptible to leaf scorch in prolonged heat and drought. In the UK, they are a familiar sight in parks and along roadsides, thriving in the temperate maritime climate.
In North America, horse chestnuts do well across the northern and mid-Atlantic states, the Pacific Northwest, and much of Canada. Growing chestnuts in Canada is broadly feasible for both ornamental horse chestnuts and some Castanea species, depending on the province and local microclimate. In contrast, hot-summer climates like much of California are less ideal for horse chestnuts, though true chestnuts have their own regional story there. If you are in California and trying to understand whether any chestnut-type tree will work in your conditions, the question of whether chestnuts grow in California is worth reading before you commit to a planting site.
One more practical note on climate: because horse chestnut seeds need that long cold stratification period, they are inherently suited to regions with cold winters. If you live somewhere with only mild winters, replicating the stratification in a fridge is essential and the tree itself may not perform as well once planted out, because it will face the same mild-winter problem year after year affecting its dormancy cycle.
What to do right now
If it is autumn and you have just collected conkers, start the process today: soak them for two to four days, then pack them into damp sand in the fridge. Mark your calendar for four months ahead. If you are reading this in spring and wondering whether it is too late, check whether you can still source fresh conkers from a reputable nursery or seed supplier (not dried, packaged seeds). Dried conkers purchased from non-specialist sources are almost certainly past viable.
There is a broader question underneath all of this that is worth sitting with: whether you can grow a chestnut tree from a nut applies across species, and the honest answer is yes for most of them, including horse chestnuts, as long as you respect the seed's biology rather than treating it like a dry packet of annuals. The reason most attempts fail is not a difficult seed; it is a dry seed that was dead before it went into the ground. Keep moisture consistent from collection through to germination, give it the cold period it needs, and you have a genuinely good chance of growing a tree that will outlive you.
Finally, it helps to understand what growing on a tree actually means for chestnuts of all kinds, because the biology of how these seeds develop inside their spiny cases shapes everything about how they should be handled after harvest. The more you understand the seed's natural cycle, the fewer mistakes you make at each stage of propagation.
FAQ
Can I grow horse chestnut trees from conkers that have been bought or stored dry?
If you mean “dried” conkers, they are usually already non-viable because horse chestnut seeds lose viability when they desiccate. Your best option is to source fresh conkers (typically autumn), or buy seed specifically sold as fresh or stored cold in non-drying conditions. If you try store-bought dried conkers anyway, expect a very low success rate, even if you stratify correctly.
What should I do if a conker floats in water, but it looks healthy?
If the conker is still plump after soaking and there is no strong off smell, it is worth trying. However, the “float test” is not perfect, so also rely on visual firmness and weight. During stratification, check every couple of weeks and remove any that show fuzzy mould or collapse, because one problem seed can contaminate the rest.
How strict does the fridge temperature need to be during cold stratification?
Yes, temperature swings matter. If your fridge is colder than about 1°C or freezes parts of the bag, dormancy can be disrupted or seeds can be damaged. Aim for roughly 1 to 5°C (34 to 41°F) and avoid letting the bag sit directly against the freezer section or back wall where it can get colder.
What’s the difference between “damp” and “too wet” during stratification?
You should keep the medium damp, not waterlogged. A wrung-out feel is the right target. If you see standing water, a sour smell, or lots of mould, your medium is too wet or not breathable enough. Refresh with fresh damp medium and make sure air circulation in the container is not entirely eliminated.
My conkers developed mould in the fridge, can I save the rest?
Mould usually indicates excess moisture or warmth. Remove affected conkers immediately, wipe the bag/container, and replace with fresh damp medium if mould spreads. There is no universal “one-time fix” because the real issue is moisture level and cleanliness, so focus on preventing sogginess and rehydrating gently rather than over-soaking.
What happens if the damp sand or compost dries out a bit while they are in the fridge?
If the medium dries out, viability drops, even if the seeds are stratified for the right total time. Mist lightly, rehydrate gradually, and then resume regular checks. Don’t soak for hours mid-stratification, that can trigger rot, instead bring moisture back to the wrung-out level.
Why did my root appear, but the shoot never comes up right away?
Germination can be staged. First you may see the radicle (the root) emerge, and the shoot can lag afterward, even several weeks, if temperatures are a bit cool or light is low. Keep moisture steady and provide bright indirect light, do not bury deeper, and wait for the first true leaves before moving abruptly to full sun.
How do I harden off horse chestnut seedlings that grew indoors or in a cold frame?
Young seedlings can handle light changes, but sudden full sun exposure can burn them. Start with bright indirect light, then acclimate over a week or two by increasing sun exposure gradually. If leaves look scorched or brown around the edges, step back to partial sun for a short period before continuing acclimation.
Why do my pot-grown seedlings rot or stall after repotting?
No. Overpotting increases the time compost stays wet, which raises the risk of root rot. Instead, move up only one pot size at a time once roots fill the container, and use a loam-based mix with added grit so the root zone drains quickly.
How often should I water a horse chestnut seedling in a pot?
Water when the top layer begins to dry, not on a strict schedule. In summer, daily watering may be needed in small pots, while larger pots or cooler weather need less frequent watering. Always empty saucers to avoid constantly waterlogged compost, especially after watering in the evening.
Is direct sowing outdoors more successful than starting in pots?
Yes, and it can change outcomes. Pots give protection from squirrels and let you control moisture and temperature, but they can also encourage you to keep the seedling container-bound too long. If you direct sow, you reduce repotting stress, but success depends heavily on critter pressure, winter wetness, and marking the spot to avoid digging it up accidentally.
If I have waited weeks, how do I troubleshoot why my conkers did not germinate?
If nothing happens after six weeks post-sowing, re-check three things in order: whether the stratification actually completed at the right cool temperature, whether the seed was still viable when collected or purchased, and whether your germination temperatures are low (too cool) or too dry. Also confirm you planted with enough cover and not so deep that the seedling struggles to emerge.
Should I fertilize horse chestnut seedlings, and when?
In the first growing season, feeding needs to be cautious. If your compost mix is reasonably fertile, you usually do not need additional fertilizer immediately, but you can apply a weak, balanced feed once seedlings have several true leaves and are actively growing. If you fertilize too early or too strongly, you can get soft, weak growth that is more susceptible to stress and pests.
What spacing and site factors matter most when planting out a young horse chestnut?
Horse chestnuts are large trees at maturity, so think ahead about placement. Before planting out, check you have enough clearance not only from buildings but also from underground services and nearby mature trees competing for light and moisture. Choosing full sun and a well-drained site now prevents slower growth later.